How to Install a Ceiling Fan in a Vaulted Ceiling With No Attic Access
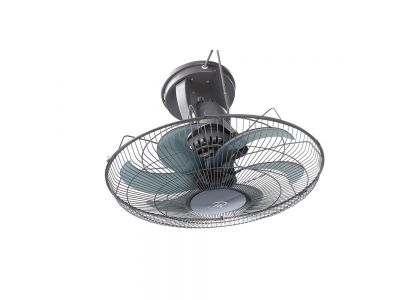
Vaulted ceilings lend a level of elegance to a room; the tall ceiling creates the illusion of a larger room. Many residents want to install a ceiling fan in a vaulted ceiling to keep the room's air circulating, but most vaulted designs do not allow for attic access. Residents can add the necessary fan by using a previously installed light fixture electrical connection and a long down-rod to clear the ceiling's angled sides.
1. Turn off the circuit breaker that provides power to the lighting fixture to be removed at the main electrical panel. Use a noncontact circuit tester device to verify that power has been effectively turned off.
2. Access the light fixture with a ladder. Ask a friend to hold the ladder's legs to ensure the most safety while working.
3. Remove the screws that hold the light fixture to the ceiling with a screwdriver. Pull the fixture from the ceiling. Untwist the wires from the fixture to the home's electrical wiring. Place the fixture aside. Allow the ceiling's electrical wiring to hang down temporarily.
4. Look up into the fixture's old hole in the ceiling and locate the electrical box. Unscrew the box from its position with a screwdriver. Place the box aside.
5. Locate a ceiling joist in the fixture's old hole. The joist may be adjacent to the fixture's old hole.
6. Place an electrical pancake box against the ceiling so that it is underneath the previously located ceiling joist. Draw a circle around the box on the ceiling with a pencil. Place the box to the side.
7. Cut the drawn hole out with a drywall saw. Wear eye protection since dust will occur during the sawing process.
8. Snake the hanging electrical wires into the pancake box's knockout hole. Push the box up into the cut hole and screw it into the ceiling joist using the box's supplied screws and a power screwdriver. Make sure that the electrical wires are not pinched during the attachment process.
9. Squeeze urethane-based adhesive onto the back of the fan's medallion piece. Place the fan's medallion over the pancake box by snaking the hanging wires into the medallion's open middle. Push the medallion against the ceiling. Secure the medallion with the supplied screws and a screwdriver.
10. Place the fan's metal ceiling plate against the pancake box in the middle of the medallion and secure with screws and a screwdriver. Make sure that the ceiling's electrical wires protrude through the plate's open hole.
11. Hold the complete fan assembly below the middle of the medallion until its blades are clear of the vaulted ceiling sides. Mark the desired height on the sloping ceiling with a pencil.
12. Measure the distance between the marked height and the pancake box with a measuring tape. Do not measure against the vaulted ceiling; measure vertically from the pancake box to the marked point to find the down-rod length needed to clear the ceiling's sides.
13. Place a down-rod of the measured vertical length onto the complete fan assembly. Snake the fan's electrical wiring up the down-rod as it is pressed into the fan assembly. Secure the down-rod with screws and a screwdriver.
14. Hold the fan and down-rod combination up to the pancake box. Hand-twist the electrical wires protruding from the ceiling and the down-rod. Consult the fan's individual manual for the specific wiring configuration. Each manufacturer has different wire orientations.
15. Secure the fan to the pancake box using screws and a screwdriver. Turn the circuit breaker back on at the main electrical panel. Turn the fan on and verify its functionality.
HiFlow Electrical Co., Ltd. is located in a home appliances production base in Shunde district, Foshan city, is a company specializing in the production of energy-saving (strong) home (commercial) fans, industrial fans, powerful industrial fans, and other kinds Of ventilation equipment manufacturers. The company has a strong technical force, and excellent production and testing equipment. And provide high-quality and excellent-performance of ventilation products to consumers...[ read more ]
![]()
![]()
![]()
![]()
![]()
![]()